Table of Contents
~
DV2000 Setup Wizard
Once the DV2000 software has been installed the installation wizard will automatically run.
Activation
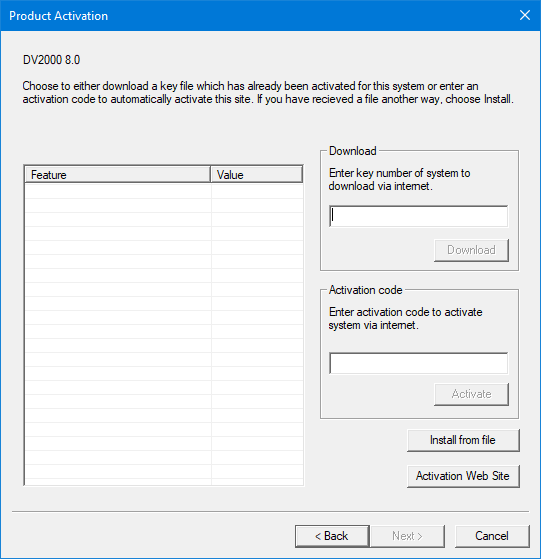
Activation can be performed in three different ways. Typically you will receive an activation code. This code can be used to automatically activate the system without DuVoice intervention. Others include self activation using the DuVoice Activation Web Site or installation of a license file.
Once a valid license is installed, the list of features will be populated.
| Setting | Description |
|---|---|
| Download | If you have an already existing license, enter it here and choose Download. |
| Activation Code | If you were given an activation code, enter it here and choose Activate. |
| Install from file | If you were given a license.lic file. Choose Install and select it. |
| Activation Web Site | Allows you to activate the system manually. Choose this option only if the previous two options are not available. You will need your license number and MAC address of your network adapter. |
Site Information
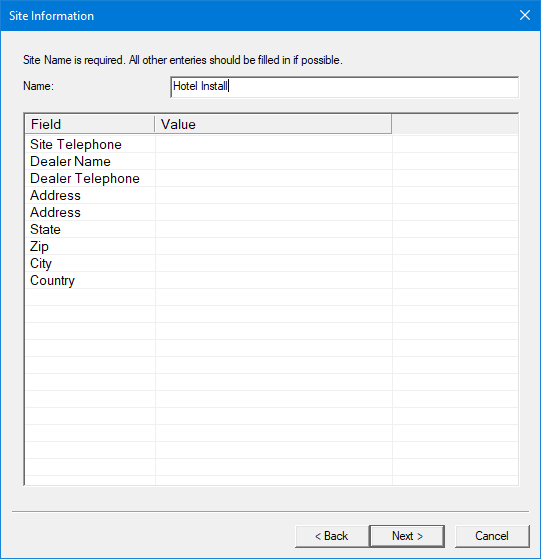
This page allows you to enter information about the site. This will help your customers and DuVoice technical support know who to contact for service.
This information can be added or changed using Configuration.
| Setting | Description |
|---|---|
| Name | Enter the name of this site. This can be the name of the company or hotel for hospitality installations. This name will appear on reports and the web interface. |
WebUI
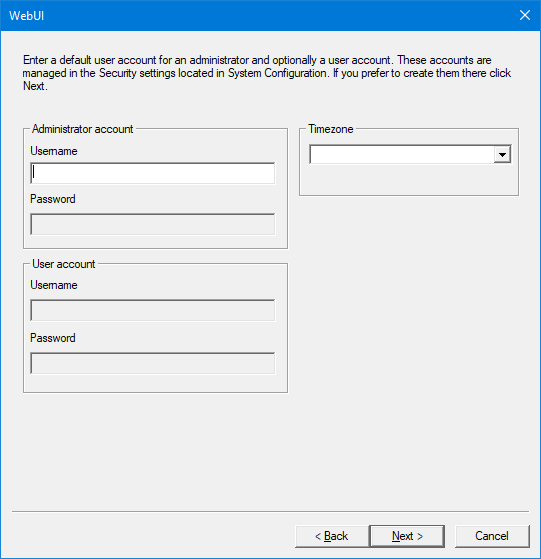
The web interface requires at least an administrator account to have been created. You can enter initial accounts here or later within Configuration.
User accounts do not have access to web administration and are typically used for InnDesk access only.
| Setting | Description |
|---|---|
| Username | A unique username. Some words are not allowed for security reasons. |
| Password | Enter a unique password. The password can be any combination of numbers and letters. |
| Timezone | Choose a timezone for the WebUI. This is critical and must be configured for the timezone the customer is in. |
Click Next once all your choices hare made.
Tenant
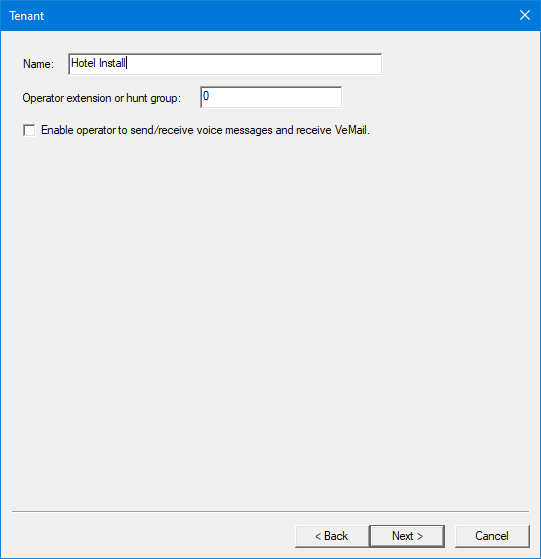
The DV2000 can be separated into Tenants. Each tenant can have it's own list of mailboxes, user accounts and PBX or PMS integrations. By default the system sets the name of the tenant to match the name of the site. This name will appear in reports and on the web interface.
For example, the site name could be Marriott Denver and the tenant name could be the hotel name like West Village Inn.
| Setting | Description |
|---|---|
| Name | Name of the tenant. |
| Operator extension or hunt group | Enter the number you wish to use for the operator. This extension must exist on the PBX or transfers the operator will fail. |
| Enable operator to send/receive voice messages | If this is checked a mailbox will be created for the operator. If this is a hunt group, leave this unchecked. |
Click Next once all your choices hare made.
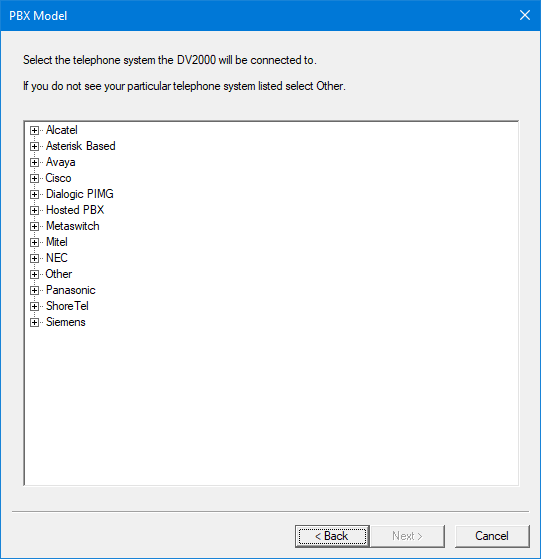
PBX Model
This allows you to choose the PBX the system will connected to. Under each tree is a list of known PBX's which the DV2000 supports. Choosing the correct or closest match will automatically configure many of the settings for you.
Most all SIP enabled PBX's use the same configuration, and only differ how Message Waiting lamps are lit.
Click Next once all your choices hare made.
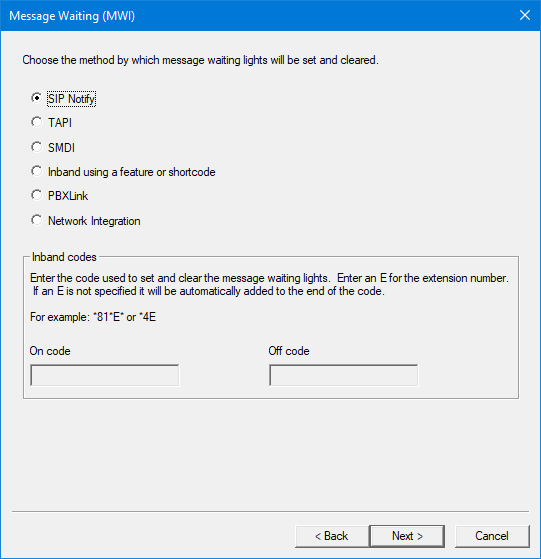
Message Waiting (MWI)
Based on your PBX selection, the screen will let you choose how Message Waiting lamps are lit. This can be changed in Configuration later if you are unsure.
Click Next once all your choices hare made.
