Table of Contents
Address list
This page allows you to configure which email addresses receive email alerts and which mailboxes receive voice message alerts.
Add an Address
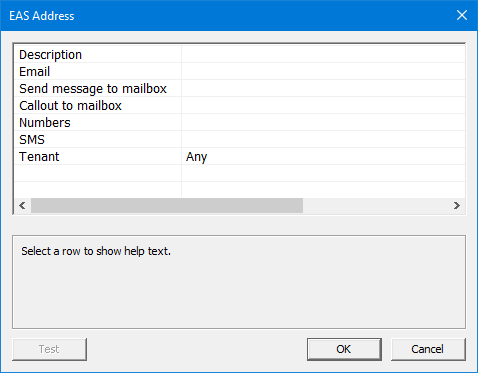
To add an address, click Add. This will open the Address dialog with all fields blank.
The fields are:
| Field | Description |
|---|---|
| Description | A brief description of the address, such as the owner's name. |
| The email address to receive email alerts. Enter one email address only. Optional. | |
| Send message to mailbox | The mailbox to receive urgent voice message alerts. Enter one mailbox only. Optional. |
| Callout to mailbox | Perform an immediate call to the specified mailboxes extension number. If there is no answer then an urgent message will be placed into the mailbox. Enter one mailbox only. Note: Mailbox must have a callout notification template added to it's list of notification templates in order for a callout to be performed. |
| Numbers | The emergency number(s) that will generate alerts to this address. Enter zero or more numbers, separated by commas. Optional. Overrides the global list for this address only. If blank, then the global list applies. Any number entered must also appear in the global list for this server. |
| Tenant | This address will only be notified if the caller's mailbox exists within the given tenant. If Any is specified then it will be ignored and any mailbox from any tenant will cause an alert. This is best for multiple tenant sites allowing only specific staff to be alerted rather than everybody on the property. |
| Slack | Choose a slack webhook to send alerts to. Must be configured via Connectors. Optional. |
| SMS | Enter an SMS number to be notified. A SMS connector like Clickatell MUST be configured for this option. Optional. |
At a minimum, fill in either an email address or a mailbox, or both, and click OK to add it.
Delete an Address
Check the box in the left-most column next to each address you want to delete, then click Delete. You will be prompted for confirmation; click Yes to delete or No to cancel.
Edit an Address
To edit an address, simply double-click on it. This will open the Address dialog with the selected address's data loaded.
To edit a field, click in the data field (the second column) of the field you want to edit. All fields are editable. Click OK when finished.
Refer to the Add an Address section, above, for a description of the fields you can edit.
Test
The system will send an EAS alert to each of the configured address destinations allowing the tech to test any alerts. This alert will also be logged in the EAS report. The alert number will NOT be 911 in order to prevent any panic for a real 911 call.
Test Data
| Alert number | 4321 |
|---|---|
| Caller ID | 7101 |
| PBX called id | 4321 |
| Caller name | [callers name] |
| Called name | [called name] |
| PBX dialed number | 5555 |
| PBX called number | 4321 |
Note: If a mailbox 7101 exists the data from that mailbox will be used.

