Add / Delete
Add Mailbox
There are two ways to invoke the Create Mailbox dialog in order to create a single new mailbox:
- Select Mailbox | Create from the main menu; or
- Right-click anywhere in the mailbox list and select New from the context menu that appears
As shown in the figure below, the Create Mailbox dialog allows you to create a mailbox by template.
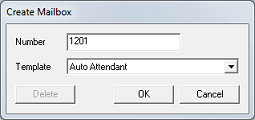
Enter the mailbox number in the box provided, then use the selection box to choose the template to copy from in creating the new mailbox. By default, six different templates are provided, each matching one of the mailbox types: distribution, group, guest, QA, standard, and system. Additional user-created templates may also be listed.
Click OK to open the mailbox editor. Edit any mailbox settings as desired and click OK to create the mailbox. Clicking Cancel in either dialog will cancel the mailbox creation altogether.
Add a Range of Mailboxes
To create a range of mailboxes, select Mailbox | Range Create from the main menu to open the Mailbox Creation Wizard. The first page of the wizard informs you of the purpose of the wizard and how it works. Click Next to continue to the next page.
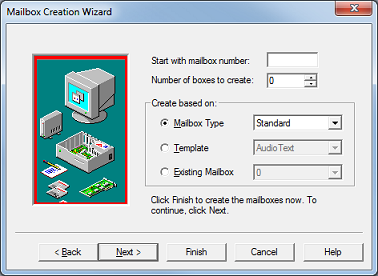
In the boxes provided, enter the starting mailbox number and the total number of mailboxes to create. Then select how the mailboxes should be created: by type or by template. You can also elect to use an existing mailbox as a template. When you are finished, click Next. Or click Finish to skip the next two pages (accepting the default settings) and go directly to the Mailbox Editor.
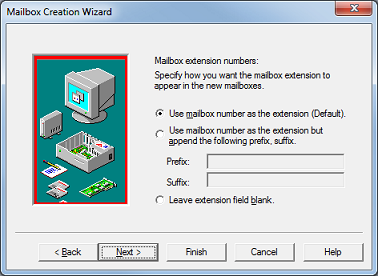
On page three, you configure how the extension numbers will be generated for the mailboxes you are about to create. By default, the extension number for a given mailbox is the same as its mailbox number. However, you can opt to have prefix and/or suffix digits added to the number, or even just leave the extension field blank.
Click Next to continue to the last page or Finish to skip directly to the Mailbox Editor.
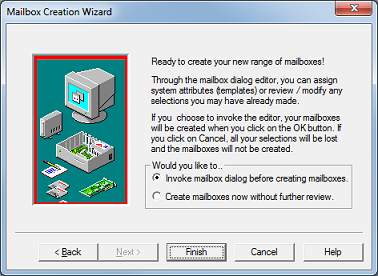
The last page allows you to skip opening the Mailbox Editor if you wish. In that case, the mailboxes will be created using the default settings for the mailbox type or template (or existing mailbox) you selected, with the extension numbers, subscriber name and address fields adjusted accordingly.
If you do opt to open the Mailbox Editor to customize the settings, the mailboxes will be created after you click the OK button in the editor; if you click Cancel at that point, all your selections will be lost and the mailboxes will not be created.
Copy a Mailbox
To create one or more copies of a mailbox, right-click on the mailbox and select Copy from the context menu. This will open the Copy Mailbox dialog, as shown below:
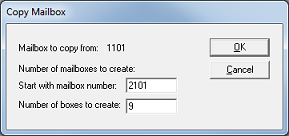
In the boxes provided, enter the starting mailbox number and the total number of mailboxes to create. In the example shown, the system will create mailboxes 2101 through 2109 (a total of 9 mailboxes). To create multiple, non-consecutive mailboxes, you will have to repeat this process for each mailbox (or range of mailboxes).
After you click OK, the system will prompt you to confirm:
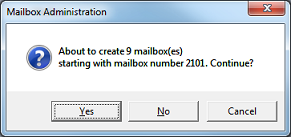
Click Yes to create the mailbox(es); click No or Cancel to exit the dialog without creating any mailboxes.
All mailboxes created this way will have the same settings as the mailbox you copied from, except that the extension number, subscriber name and any other addresses (such as MWI 0) will be changed to reflect the new mailbox number.
Delete a Mailbox
Selecting the Mailbox | Delete option from the menu will open the Delete by mailbox number dialog, as shown below:
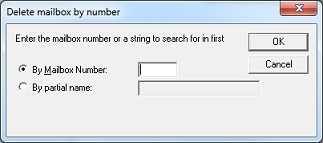
Either select the By Mailbox Number option and enter the mailbox number to be deleted, or select By Owner's Last Name and enter the last name of the subscriber whose mailbox you wish to delete. Then click OK to continue.
The application will search the mailbox list for the specified mailbox number or subscriber name and, if a match is found, will prompt you to confirm that that is the mailbox you wish to delete; click Yes to delete or No to cancel.
All of the data that comprises the mailbox will be permanently deleted from the system. Mailbox deletion cannot be undone.
Direct Deletion via the Context Menu
Mailbox Administration also provides a way to delete mailboxes directly by selecting one (or more) mailboxes in the list displayed in the right pane and then right-clicking on one of the highlighted rows. This will display a context menu, similar to that shown in the figure below:

Click the Delete option and the application will ask you to confirm that you really want to delete the selected mailbox(es).
Click Yes to delete or No to cancel.