Automatic backup
Any system installed as, or upgraded to, version 6.0 or later is auto-configured to perform a backup of the system every day at 11:30 p.m., using the Task Manager application built into Windows.
What Gets Backed Up
By default, the backup process will save all configuration settings, databases and report information. This includes the following items:
- All mailbox records
- All scheduled events
- All messages
- All active templates, including: notifications, message delivery, call routing, COS, and PBX integration templates
- All profile and tenant settings
- All IVR files
- All custom language files (must be located in the
CUSTOMfolder for the given language) - Wakeup call database
- Distribution list database
- Group database
- Guest database
- Inventory and room status database (used by the ISI and RSI IVR applications)
- InnDesk user database
- InnDesk configuration database
- Line configuration
- VeMail configuration
- Hospitality configuration
- SIP configuration
- PBX link configuration
- Push server configuration
- Hookstate monitor configuration
Where Backup Files are Stored
All auto-generated backup files are stored in the C:\VMBACKUP folder.
Each file is named using the format:
<license number>-<product version>-YYYYMMDDHHMM.vmb
For example, a backup at 11:30 p.m. on March 15, 2017 on a 7.00.59 system with license number 12345 would produce the following file:
12345-6-00-59-201703152330.vmb
Logging
Each time a backup is performed, it will be logged in the Windows Event Viewer. The log entry will include a list of what was backed up.
Change the frequency of backup
To review or edit the schedule for the backup task, follow these steps:
- (Windows 7) From the Start menu, select All Programs | Administrative Tools | Task Scheduler.
(Windows 10) From the Start menu, enterTask Schedulerin the search box and click on the matching entry.
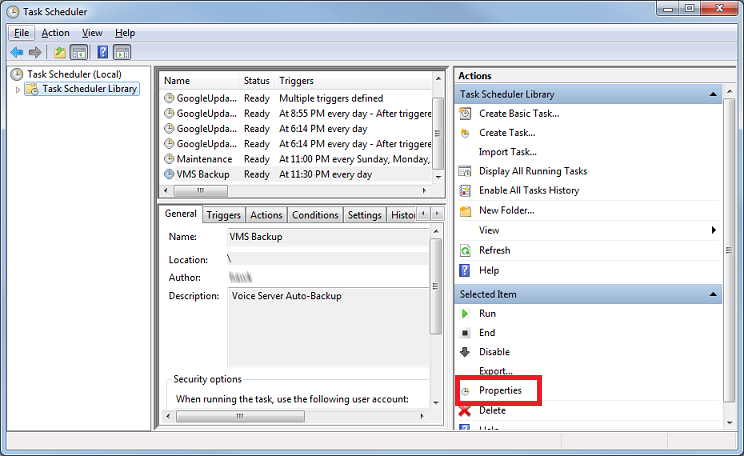
- In the left pane, select Task Scheduler Library. Then, in the middle pane, select the VMS Backup entry.

- In the right-most pane, near the bottom, click on Properties.

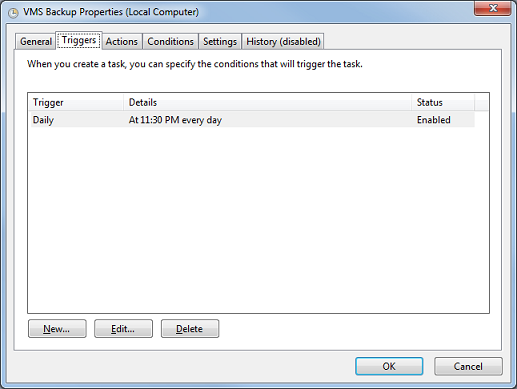
- On the VMS Backup Properties dialog, select the Triggers tab. Double-click on the entry in the table, or select it and then click Edit.

- A full discussion of the options on the Edit Trigger dialog is beyond the scope of this document. However, you can use the settings on this dialog to change the frequency of the task (daily, weekly or monthly) as well as the time of day when it will be performed. Advanced settings provide further refinement (but for most cases should all be left disabled). The last setting at the bottom of the dialog, Enabled, should remain checked. If unchecked, the task will be disabled and backups will not be performed.

- Click OK to save your changes and close the Edit Trigger dialog.
- Click OK again to close the VMS Backup Properties dialog.
- Select File | Exit to close the Task Manager.
Change the number of backups to retain
To review or edit the backup retention setting, follow these steps:
- (Windows 7) From the Start menu, select All Programs | Administrative Tools | Task Scheduler.
(Windows 10) From the Start menu, enterTask Schedulerin the search box and click on the matching entry.
- In the left pane, select Task Scheduler Library. Then, in the middle pane, select the VMS Backup entry.

- In the right-most pane, near the bottom, click on Properties.

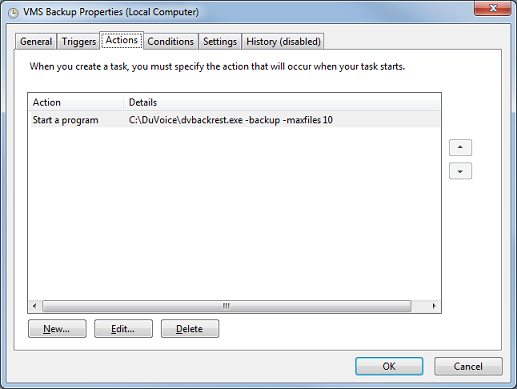
- On the VMS Backup Properties dialog, select the Actions tab. Double-click on the entry in the table, or select it and then click Edit.

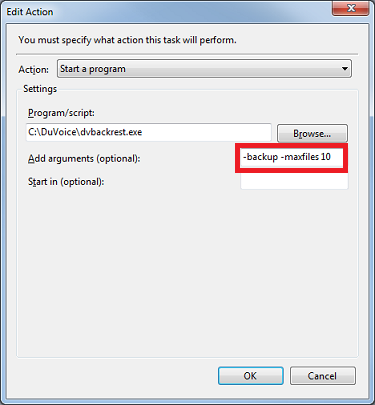
- To change the retention value, edit the Add arguments box, highlighted in the dialog below. Change the default value of
10at the end of that entry to your desired value. The minimum value allowed is 2. For example, if you want to keep only the last 5 backups, change the entry to-backup -maxfiles 5

- Click OK to save your changes and close the Edit Action dialog.
- Click OK again to close the VMS Backup Properties dialog.
- Select File | Exit to close the Task Manager.